Tips to Secure Your WordPress Site Against Brute Force Login Attacks
Categories: WordPress
You may have heard of, or have fell victim to, the recents attacks on WordPress driven sites across the Web. Since about a week ago, a botnet consisting of a cluster of “tens of thousands” of computers was used to attempt to gain access to WordPress sites. And some say, it was just “practice.”
The attack was specific: Use the default “admin” username and attempt to discover the password.
Now would be a perfect time to evaluate the security of your WordPress site and make sure your site is secure. In this article I have covered some tips to secure your site against brute force login attacks.
Also, checkout the following two WordPress security tips articles that we published earlier:
- Essential WordPress security tips
- Advanced WordPress security tips
Don’t Use ADMIN as your WP Username
So, tip #1: Change your username on all your WordPress accounts pronto – actually, you didn’t leave it as admin during installation anyways right? You’ve been able to customize it since version 3 came out.
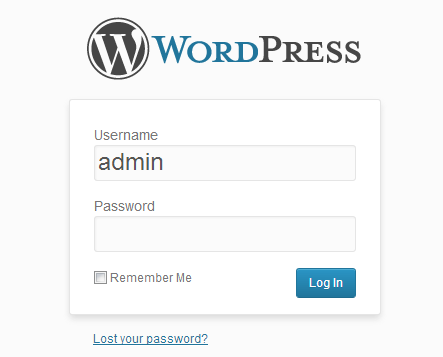
Do the following steps to change your “admin” username:
1) Login to your WP-driven web site
2) Click Users >> Add New from the left menu
3) Create a new user (not similar to your blogging nickname), and use a strong password, and specify an “Admin” role.
RoboForm is a good tool that not only generates strong passwords, but also stores the login info (including the login URL), and offers 1-click logins. It’s worth getting. There’s even a cloud version.
Now it’s time to assign all admin posts to the new user. The best way is to login as the new user, delete the previous “admin” account, and “Attribute all posts and links to” the new user (don’t worry you will be prompted.)
But if for some reason that I can’t think of, you want to keep the “admin” account, you can follow the steps below to re-assign the posts to the new user. But for sure you will want to demote the Admin role to the most basic user. But you should also reconsider your decision not to delete the admin account.
4) Go to Posts >> All Posts
5) In the list of posts, click on any of the “admin” links under Author.
Note: you will be working with 20 posts at a time by default. You can change that number to a higher one by clicking on Screen Options (top right) and upping the number of posts to display in one screen. After changing the number, click Apply.
6) Click on the checkbox next to Title near the top left. This lets you select all posts on the page for bulk editing.
7) In the Bulk Actions drop down, choose Edit. Click Apply.
8) Change the Author value to the newly created author, and click Update.
I know that it seems like a lot of work, but it’s actually fast. But next time, edit the “admin” name during install instead, and you won’t be victim of a future brute force password attack.
Patch your WP Install in Real Time
CloudFlare, a service that lets you funnel your web site traffic through them (with a simple DNS change), has issued a patch for the latest threat that will block the bot before even reaching your WP site.
CloudFlare, as many know as a CDN (Content Delivery Network), which keeps static content closer to your web site visitors for faster delivery, is more than that as I became aware today.
With your web traffic funneling through them first they will:
a) block most of the threats before reaching you
b) save your bandwidth
c) speed things up
This is for more than just WordPress sites. It will work for all platforms and apparently only takes 5 minutes to setup for most people. There’s a free plan and some premium plans. I personally don’t feel 100% comfortable funneling my traffic through a third party, but I also get nervous when they refer to my sites as “naked.”
Maybe such a service is worth considering?
Updating WordPress to the Latest Version
Gone are the days where people edit the core files of WordPress right?
I’m still guilty of editing my themes directly out of laziness. I know I can create a child theme or create some plugins, use custom styles and functions, but I don’t.
So, I lose the ability to one-click update my themes. That’s unfortunate (sometimes), but I don’t mess with the WP core, and when an update is avalable I go to all my sites and perform an update immediately.
People, good and bad, have access to the core WP code. The bad guys attack any exploits found. The good guys report and/or fix the exploits, and an update is posted. Without the update, your WP site is vulnerable (unless it’s just a feature upgrade).
Updating is easy. Go to Dashboard > Updates and you’ll see how in there. And if you are with a fully managed WP service like WPEngine, or you used your hosts “quick install” app, you are most likely getting the updates without any intervention.
But update you should. Always. Without fail. Same for plugins, and themes. D’oh!
Delete unused themes and plugins too. And make sure you are using plugins from reputable developers.
Updating the Password to Something Stronger
As mentioned, RoboForm generates strong passwords, but you don’t need a paid tool for that. There are lots of free web based apps that generate strong passwords out there.
People need to stop using kids and pets names, and dictionary words as passwords if they want any type of security.
The requirements for a secure password are:
- upper and lowercase letters
- at least eight characters long
- and including “special” characters (^%$#&@*).
I personally try to keep mine at 15 characters, and with RoboForm I can ensure a certain amount of numbers and special characters make it in there. When are they going to allow Tab, Shift, and CrLf in passwords? Is that possible? If so, get on with it password gods.
Password Protecting the wp-login.php File
Another line of defense is to password protect the wp-login.php file, which is the code that is executed to display the WP admin/user login form.
1) Create a password file – Open up a text editor, and create a file (use “save as,” and change to “all file types” because this won’t be a standard .txt extension) called .wpadmin and add the username and encrypted password using the steps below. Note the dot (.) at the beginning, and there is no actual filename, just an extension. If you are familiar with .htaccess you know what I’m talking about already.
The password to be used in the file should be hashed using the MD5 algorithm, making it useful for both Windows and Linux machines.
Here’s the format:
username:encryptedpassword
To create an encrypted password:
a) Visit http://www.htaccesstools.com/htpasswd-generator/.
b) Enter a username and desired password in the appropriate boxes and click Create .htpasswd file.
c) Copy the generated text to your .wpadmin file and save it.
2) Upload the password file – Upload the file to a non-browsable folder.
Place it in: /home/username/ if using CPanel (‘username’ is not literal, it is your CPanel username), or /var/www/vhosts/domain for Plesk for example.
3) Update the .htaccess file – All domains under the “home” directory will utilize this password file. Therefore, if you have several add-on domains in your account using WP, they will all access the same password file.
Create a .htaccess file in a similar way that you created the .wpadmin file. Also, it will ultimately be uploaded to the same place.
The content for the file: (be sure to change the AuthUserFile path to the appropriate location – in most cases that means: replace ‘username’ with your cPanel username):
ErrorDocument 401 "Unauthorized Access"

ErrorDocument 403 "Forbidden"

<FilesMatch "wp-login.php">

AuthName "Authorized Only"

AuthType Basic

AuthUserFile /home/username/.wpadmin

require valid-user

</FilesMatch>
Things to consider before employing the wp-login.php file protection. Do your sites cater to many users? They will all need to know the login info. Plus, if there is already a .htaccess file in the /home/username/ folder, you may need to merge the contents.
Ok, once it is in place and you visit the wp-login.php page of a WP install you will be prompted with a pop-up login screen that says:
Authentication Required

The server http://www.domain.com:80 requires a username and password. The server says: Authorized Only.
Two Step WordPress Authentication
To really remove yourself from the “potential victim” list, you can employ another layer of authentication security, by implementing Two Step Authentication.
This is highly similar, and just as effective as the Google 2-step verification system.
It uses a random code sent to you by text as the “second” layer of authentication. Brilliant! Providing you have a smart phone, and it’s with you.
A similar system has been employed for WordPress.com users, and it seems Authy is the standard solution for self-hosted WordPress blog, at this time, based on my searches.
CloudFlare, mentioned above is apparently a company “Secured by Authy,” according to the web site.
With that said, more my style, is using a plugin created by the WordPress team. According to a post by Nandita B. on SEOHour, the 2-step auth feature used on WordPress.com, will become available at some time in the future with WordPress’s JetPack plugin.
IP Limiting Plugin
As Matt Mullenweg points out, using an IP Limiting plugin would not be useful to ward of this recent attack.
“Most other advice isn’t great — supposedly this botnet has over 90,000 IP addresses, so an IP limiting or login throttling plugin isn’t going to be great (they could try from a different IP a second for 24 hours).”
– said Mullenweg
Just performing one of the suggestions from above will put you ahead of the game. Doing them all will certainly have stronger affects. I personally have skipped the use of Authy, and plan to wait for the JetPack update. I just subscribed to its feed in Feedly so I’ll be informed as soon as they blog about it. Also, for now at least, I’m not going to setup the CloudFlare option. Are you?
I already had the rest in place on all of my installs except for the password protected wp-login.php file which took all of 3 minutes to implement. I already had strong usernames and passwords, and up-to-date WP files.
Keeping Your PC from Participating in the Bot Attacks
It’s great that we’re contributing to helping people beef up their WordPress security in light of recent attacks, but what about the other side of the coin?
Some hackers will install “hidden” software on user’s machines without them being aware of it and use the machine to do some damage on the web.
Having a strong Firewall (that is fully patched) can keep people out. Of course, Anti-Virus software helps as well. And locking down a home’s WiFi can keep the computers on your home or office network safe from outside attack (or out of reach from bandwidth thief).
Check out the video below which explains how to secure a WiFi connection. It also talks about securing an FTP connection which could be of some benefit for web masters like yourself.

